
Warehouse
In this module, learn about Warehouse in Blocks and how to add just the assets you need for your requirements.
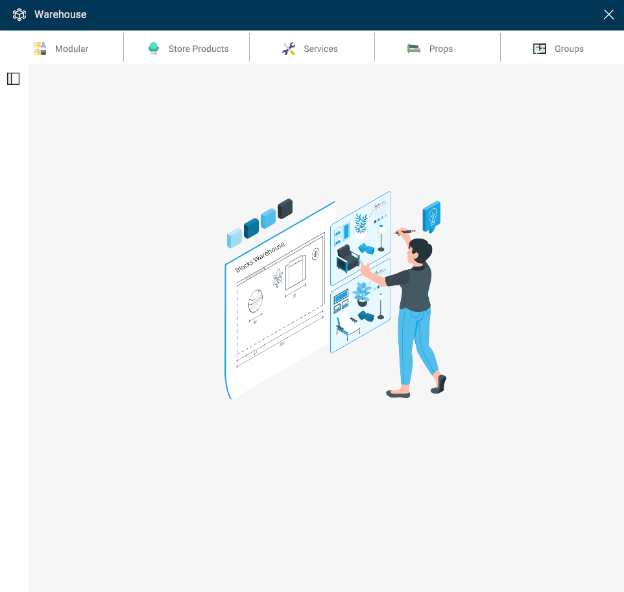
The BLOCKS warehouse is a space that holds the catalog offerings provided by Interior Company. You can access our data library through the warehouse, where assets required for any project can be easily found.
The Warehouse has 5 sections of assets which further contain multiple categories of assets in their class. These sections are:
- Modular: Contains the entire modular catalog which can be added in the project for 3D visualisation as well as costing.
- Store Products: Contains the entire store catalog which can be added in the project for costing and in some cases visualisation too.
- Services: Contains the entire service catalog which can be added in the project for costing.
- Props: Contains an elaborate props library and can be added in the project for visualisation.
- Groups: Coming Soon!
The assets available under each category will vary based on the type of room selected. For example, the modules available under the modular section in Kitchen room type will be different from that of Bedroom room type.
Let us now go through each section one by one and understand the nuances of each section.
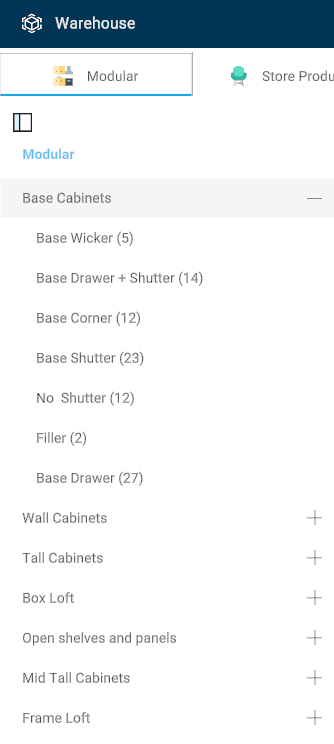
Modular
Upon opening the modular section, you will see various Categories of modules based on the room type. These categories further have various subcategories which contain individual modules. To open the category and view the subcategories, click on the + sign.
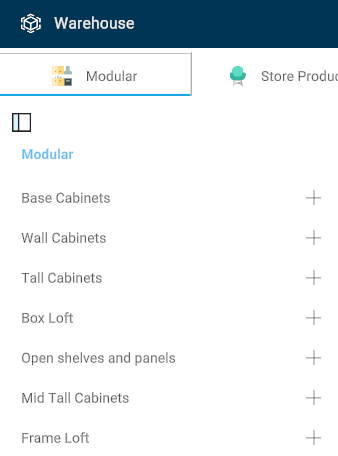
Pick the sub category as per your requirement and you will see all the individual modules available in that sub category.
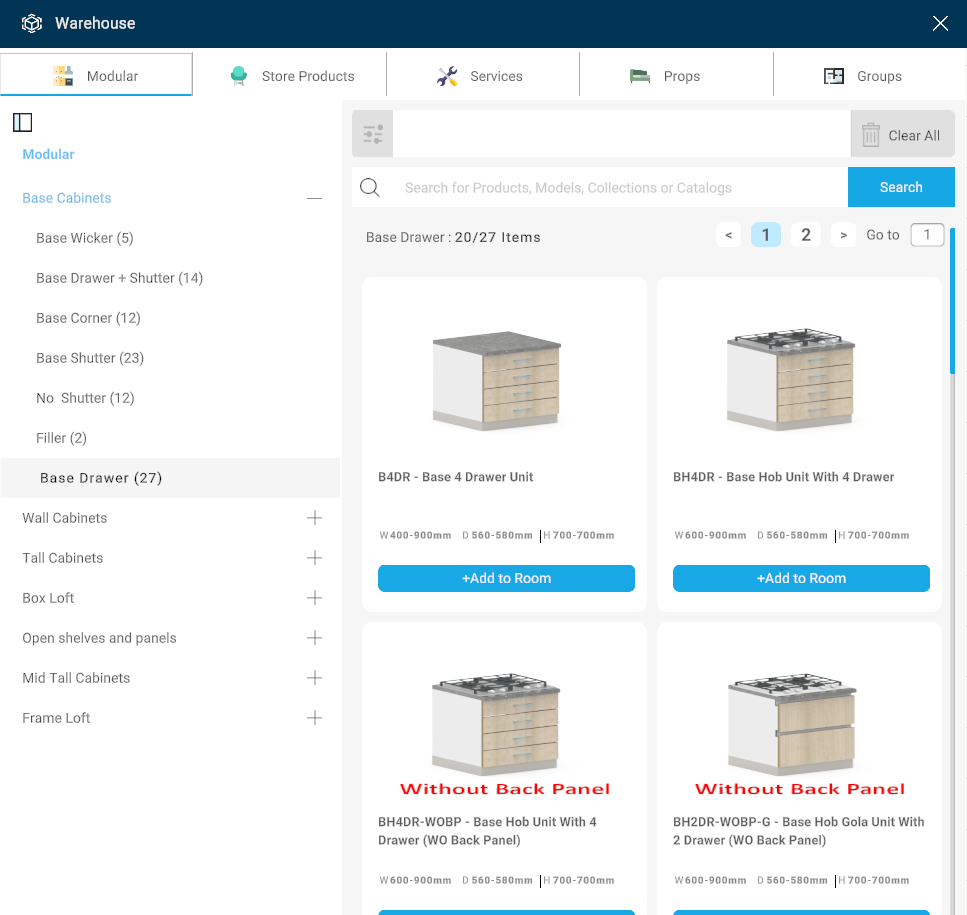
Before moving to add any module, you need to get to the right module. Here is how you can navigate through the module library:
-
A single page will display up to 20 modules and you can scroll down in the warehouse to see the modules on each page. Use the bar at the top to see the number of modules available and see the number of pages in the sub category. Use the page number button/ arrow button/ Go to Page Input value to go to the desired page.

-
You can use the search bar at the top to search by name/code of the module. This will also change the number of modules available as per the search criteria.
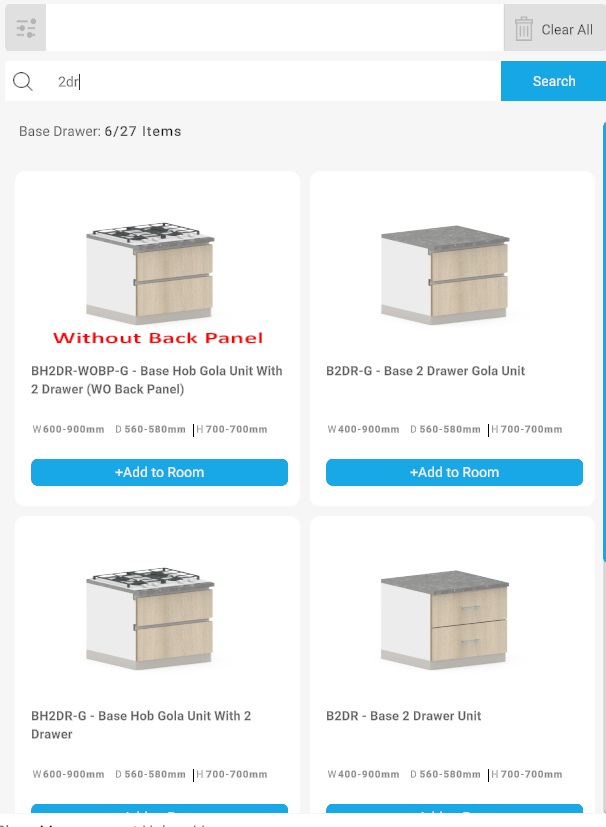
Once you have navigated to the required module, click on ‘+Add to Room’ button to open the Addition Dialog Box for the module.
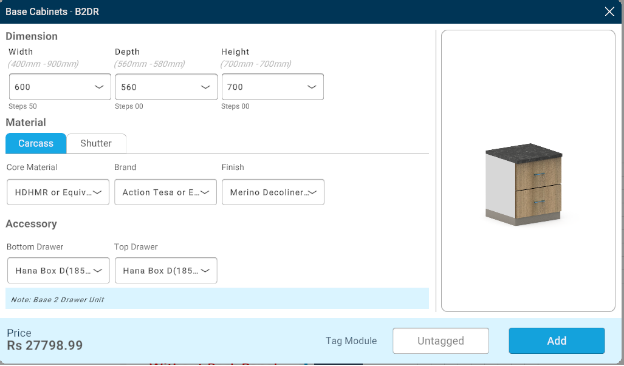
This Dialog Box Contains 5 sections:
-
Dimension: This section contains the option to select dimension parameters for the module to be added. It is in the top left of the box. It contains a default value for each dimension category which is the most commonly used dimension as well. This helps make the workflow faster.

With each dimension category, there is a minimum to maximum range displayed which defines the dimension limitation for that particular module. The dropdown will contain other most commonly used values in addition to the default one.
Apart from this, each category has steps mentioned below it. The steps are the discrete intervals by which the value of the module is permitted starting with the minimum size. For example, in the above example, Width range is 400 mm - 900 mm and steps are shown as 50. Hence, the widths possible are 400, 450, 500, 550 and so on till 900. Widths cannot be values like 410, 425, 675, 890 etc. Similarly, Depth range is 560 mm - 580 mm and steps are shown as 0. Hence, only values 560 and 580 are possible and no other depth values are possible.
-
Material: This section contains the carcass and material selection drop downs. The default materials here follow the Room Settings set by the user for each category. It is in the middle of the dialog box.
 You can change the materials here without affecting the room settings for any exceptional case in any of the categories.
 -
Accessory: This section contains the applicable accessory data. This section will vary in number of drop downs as per the module. It is towards the bottom of the dialog box.

- Image: The right hand side section of the dialog box contains the image of the selected module for easy identification.

-
Bottom Bar: The bottom contains bar has the following from left to right:

Price: The real time price based on the selection in upper sections. This price will change as changes are made in the upper sections.
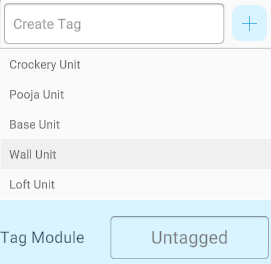
Tag Module: This button will let you tag any module you add as per the item it is going to be a part of. Modules tagged under the same tag will be visible together in the BOQ under tagged label for easy understanding of the customer. Tagging is a mandatory process and modules can be added to the room only once they are tagged. To make it easy to tag, the user is required to tag the first module in the room and the last selected tag will be auto selected while adding the nex module. It can be changed at any time before or after adding the module. Some default tags are already made for selection. You can also create your custom tags by clicking on the “+” icon.
Add: This button is going to be used to add the module to the room. It will be enabled once a tag is selected.
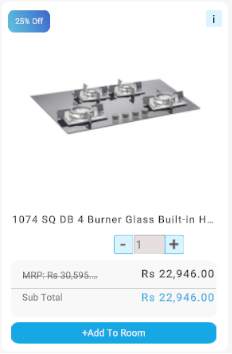
Store Products
Similar to the modular section, you will see various Categories of products and their subcategories can be accessed by clicking on the + sign. Upon opening the subcategories, its entire catalog appears in the warehouse.
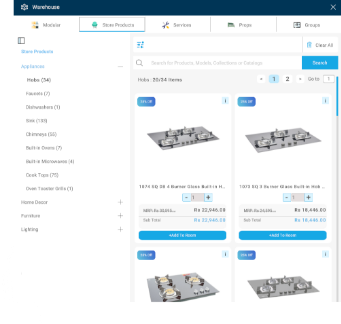
You can search the products using the search bar.

You can also use the various interlinked filters to get to the desired product requirement quickly.
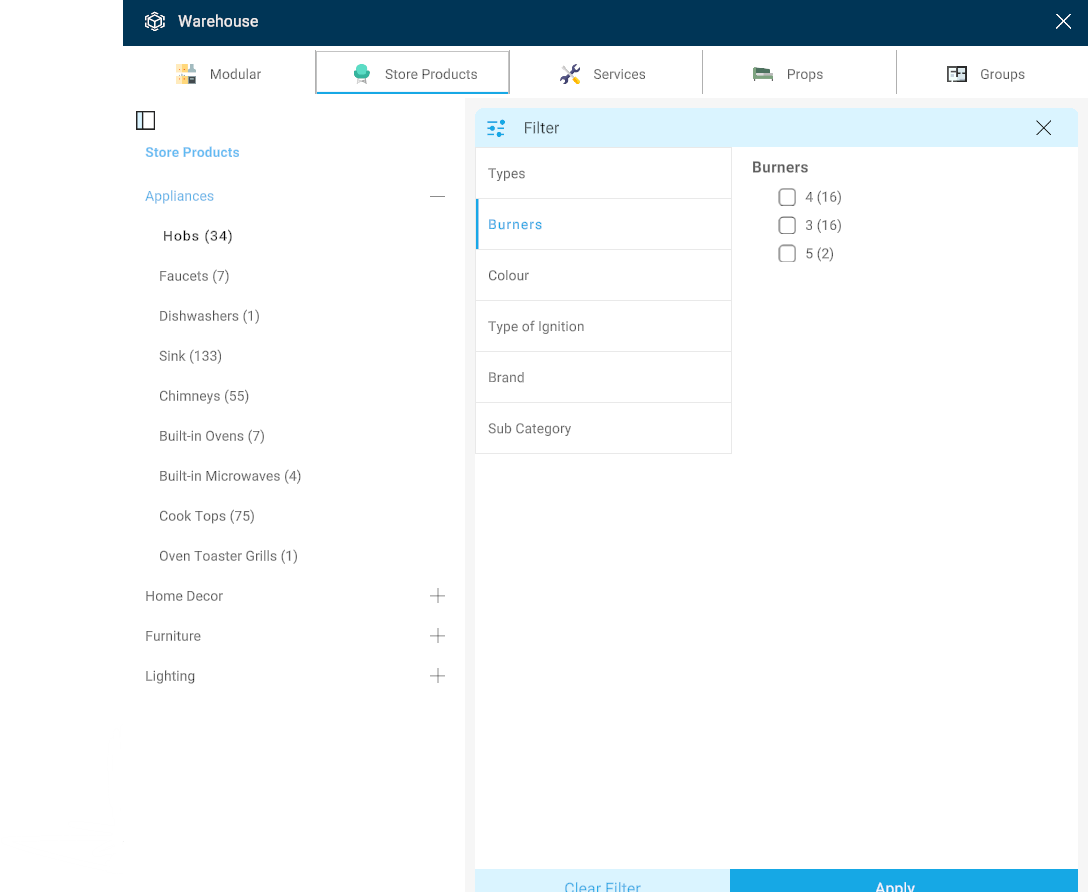
Use the + and - buttons to change the quantities and click on ‘+Add to Room’ to add it to the costing. You can use the ‘i’ button to view more information about any product in detail.
Services
The interface and the steps to search, filter and add are the same as the Store Products section.
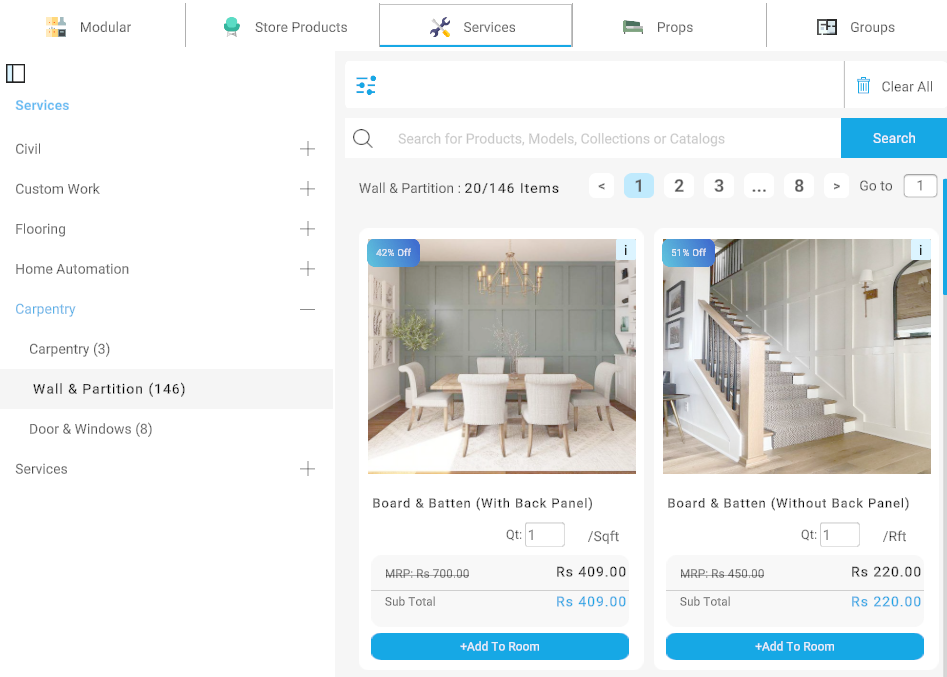
Use the + and - buttons to change the quantities and click on ‘+Add to Room’ to add it to the costing. You can use the ‘i’ button to view more information about any service in detail.
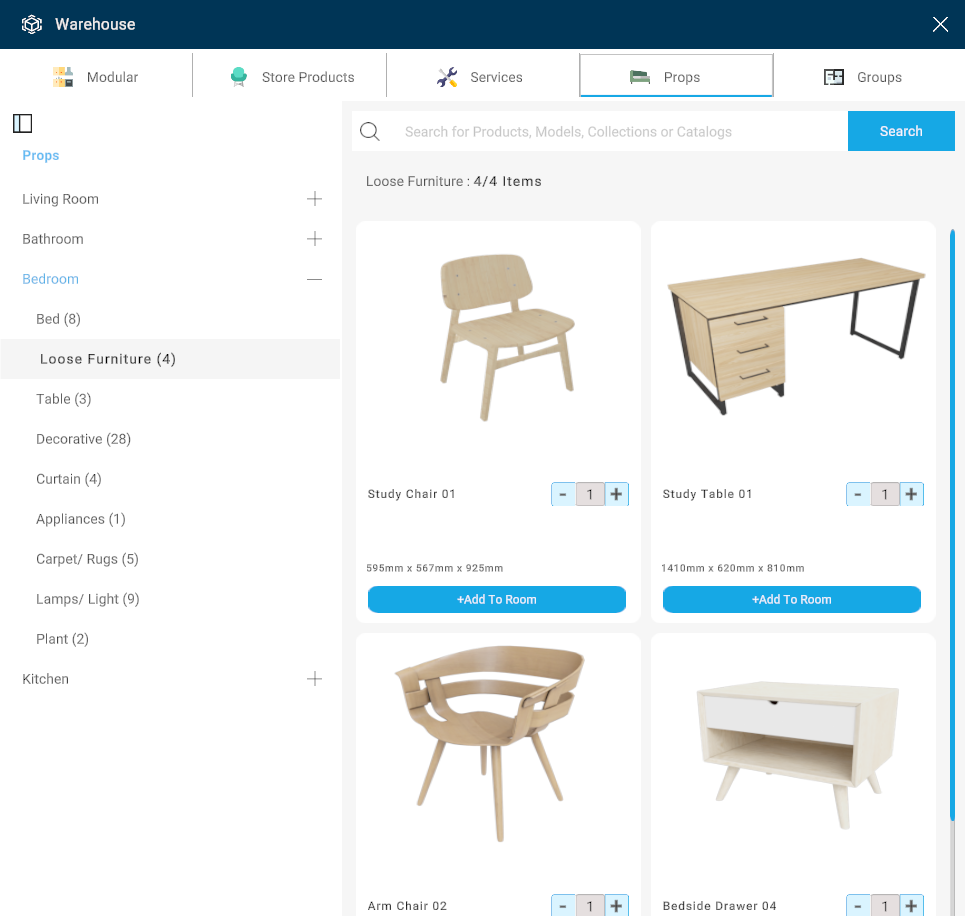
Props
These are the 3D models which can be used to visually enhance the model and get added only in visualisation.
The interface is similar to the previous categories and the search bar functions the same way and so does the ‘+Add to Room’ button. There are filters in this section.
Once a prop is added, you can select it and do the following actions with the icons at the bottom:
- Copy
- Delete
- Scale
