
Creating a Design
In this module, learn about using the tools and warehouse to create a design in the created room.
Once you have created a room and set the room settings, you can start adding the required modules. Once you have some/all the required modules, you can start placing them correctly as per the design.
Placing the Modules
You will be using the following tools to achieve the same:
-
Move (M)
-
Rotate (Q)
-
Snap (S)
Let us understand the functionality of each of these tools in detail.
-
Move: Upon selecting any module, three movement handles, Red, Green and Blue will appear which can be used to move the module in their respective axes.

The origin of the handles also has 3 squares, Red, Green and Blue, which can be used to move the module in 2 axes except for its respective one. For example, by selecting the red axis and dragging, you will be able to move the module in both the blue and green axis but not the red axis.
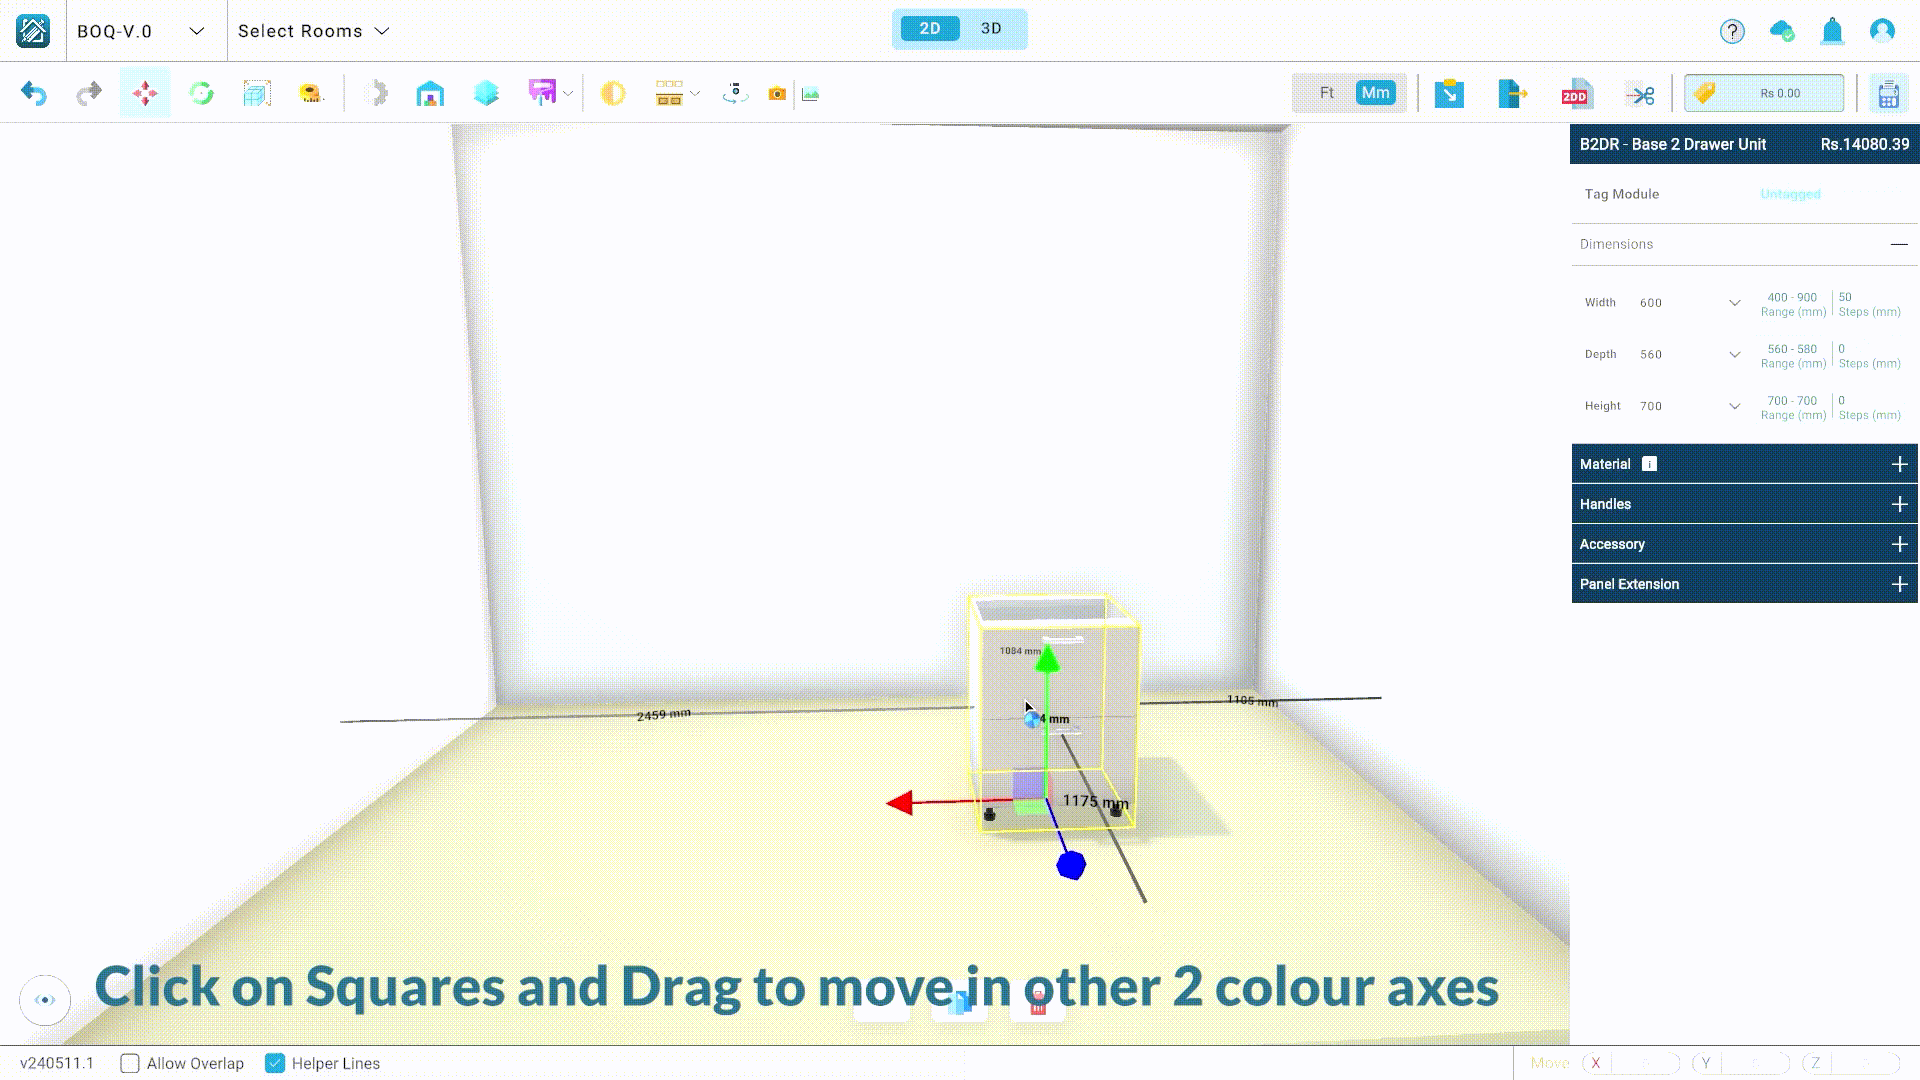
You can also use the Controls Bar at the bottom right to move the modules accurately by input values in any given axes.
![]()
- Rotate: Upon selecting any module, a dial will appear around it which can be used to rotate the module with increments of 15°. Use the left click on the dial and drag in the direction you wish to rotate the module in.

Alternatively, for faster workflow, you can use the arrows keys on your keyboard to rotate the module in increments of 90°. Use the left arrow key to rotate counter-clockwise and right arrow key to rotate clockwise.

-
Snap: Use this tool to accurately position modules with respect to positions of other modules. The steps to use this tool are as following:
-
Select the module which you wish to move in position.
-
Select the snap tool or press S (shortcut for snap tool).
-
The bounding box will now have blue dots on all its corners. Select the desired corner snapping point by left clicking on it.
-
Select the module you want to snap the first module to. Doing so will show red snapping points on all its corners.
-
Hover over the snapping point you want to snap the first module’s selected snapping point to. There will be a green bounding box upon hovering. If the bounding box that appears is red in colour, that means the snapping cannot be done as it will result in overlapping. Select a different point or click on ‘Allow Overlap’ checkbox if you still wish to proceed with the snapping.
-
Once the bounding box is green, simply click on the snapping point of the second module to complete the snapping of the first module.
-

Put together all the required modules in the correct positions to create the modular design.
Countertop and Skirting
To complete the modular design, you need to add countertop and skirting.
Select the first base/tall module and hold the Shift key on the keyboard and start selecting all the modules you wish to generate skirting for.
Once selected, select the Add Skirting tool and select Add Skirting. Select the desired height and colour and generate the skirting.

Select the base modules by following the same process as above and select the Add Skirting tool and select Add Countertop. Select the desired options in all the mandatory fields and add the countertop.

Add the required props and place them using the same process used to properly place the modules.
